Seed Sowing and Pricking Out
It’s almost time to start buying seed and sowing it! There is nothing more exciting than eating something you have sown and grown yourself (and no taste like it for that matter!), or enjoying flowers you have cared for from the moment you opened the seed packet! It’s thrilling watching them germinate, pricking them out and seeing them reach their final stage!!
Of course, there are a few simple tips to successful growing. First, choose good seed! Here at the nursery we sell “Mr. Fothergills”, which we believe produce the best result. Whatever seed you choose, it is best sown into a good quality multi-purpose compost such as the “Clover” compost, also available to purchase from the nursery.
Into a seed tray, or similar, it’s best to gently sieve some compost, or break down any lumps to make a smooth, soft bed for your seeds to grow on. Scatter the seeds evenly, and not too close together as this will make pricking out so much easier.
You can either cover the seeds with a fine layer of multi-purpose compost or use vermiculite as we do here. Water in gently and make sure compost does not dry out, or kept soaking wet.
Now is the time for patience! I remember when I was young my dad sowing some seed, then five minutes later poking them to see if they were doing anything!! He certainly did not have any patience in that direction!
There is nothing more thrilling than when you first notice signs of life coming through. Different seeds vary in their length of germination. For instance, hellebore seedlings can take many weeks to germinate, whereas vegetables and flowers take considerably less.
As soon as you can see the first two leaves, poking boldly through it should be safe to handle them. Here at the nursery, seedlings are pricked out into 9cm pots or “strip trays”. A good quality multi-purpose compost should be fine to prick your seeds out into. Of course, it depends on the plants you are growing; you may need an ericaceous compost if you have acid loving plants.
 There is one, real golden rule to pricking out. Never handle the stem of the seedling. Rather hold the leaf of the plant between thumb and finger, with one hand and gently push up the compost with the other hand using either finger or pencil, or similar. Gently pushing the compost and lifting the seedling enables you to see the full root of your new plant. If you happen to tear a leaf on your new seedling, another one will grow, but if you damage the stem of the plant, it will more often than not kill it. It is better to lose a leaf than the actual plant so patient handling makes a better success.
Once the seedling has been lifted, transfer it into its new pot, having already made an indentation, or hole into the centre. The depth of the hole depends on the length of your seedlings roots. Hellebore seedlings are deep rooted, whereas other plants are much less. Cover your seedlings gently by surrounding them with the compost but do not compress it. You can now water in gently.
Keep an eye on your new plants, which are usually grown best out of direct sunlight, depending on what they are, and keep watered. Do not allow them to dry out, or become too wet.
Once your young plants have developed further and are of a reasonable size, they will be ready to transplant. Obviously, depending on the seeds you grow, temperature is vital.
Tender plants will not enjoy being exposed to the cold. It will not be safe to put Bedding Plants out until the end of May, as frosts can still occur. After all your careful effort from growing as a seed, you do not want to risk cold weather from killing them. Patience is worth the wait.
Another factor to think about when growing your nice juicy seedlings is the risk of something else enjoying them before you do. Such as slugs! Slug attacks do happen, as we are all aware, and that can be quite soul destroying after all your efforts. Therefore, you may wish to safeguard against this happening by using slug aids. We have these available at the nursery for you to purchase. I know some of us do not agree with this, and there are many other defenses, but if not corrected, you may end up with fewer vegetables, and fat slugs!
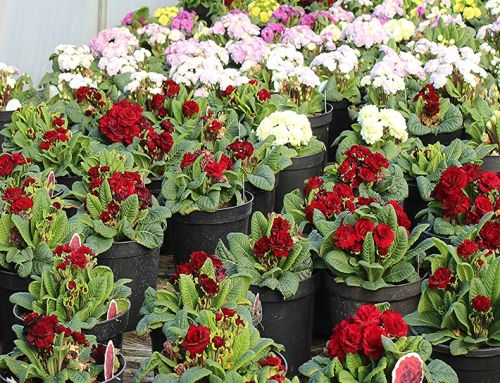
In any case, we have all your needs and requirements here at the nursery. Compost, vermiculite, seeds, slug aids, and not to forget seed trays and pots. We also have pots that are recycled to take free of charge once the nursery re-opens.
If you do not fancy the challenge of growing from seed, we will be growing plenty of vegetables that you can buy already in seedling form. Usually eight plants to a strip.
However you choose to grow your plants, whether from seed yourself, or as young plants from the nursery, it is always an exciting time. I believe as well that there is a lot of satisfaction to be gained from either.
Roll on spring, and I wish you all much enjoyment and success in your growing.